

How To Set Iphone Camera To 280 X 296 Pixels
Reading Time: ten minutes read
The iPhone's built-in camera settings are full of helpful features to make taking better photos a breeze. From setting the timer for hands-free shooting to adjusting the brightness for a well-exposed shot, our guide covers everything y'all demand to know nearly the Camera app's best features and how to use them.
How to adjust iOS camera settings for optimum quality
While most camera features are available within the Photographic camera app, some are merely accessible via Settings – adjusting your iPhone camera size settings, for example.
To alter your photo resolution to the highest quality available, follow the steps below:
1. Open Settings on your iPhone
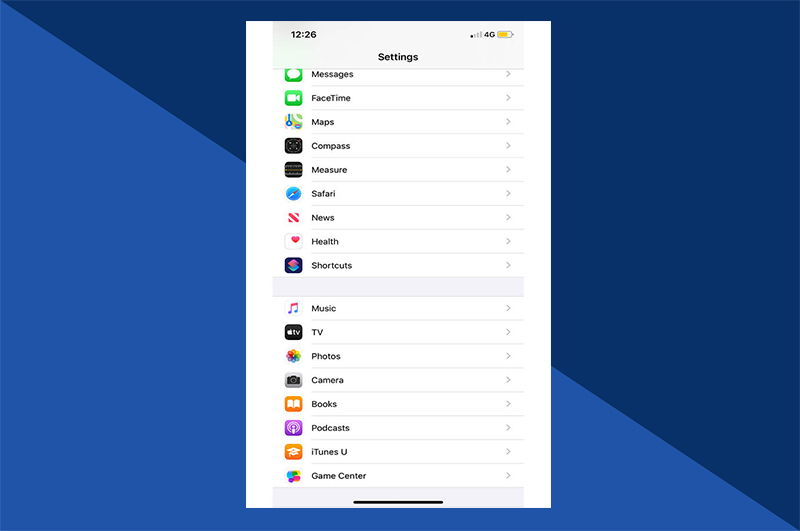
ii. Click on Camera.
3. Select Formats.

four. Select Most Compatible. This results in college quality photos past saving images in JPEG format.

To change your video resolution to the highest quality available, follow the steps below:
i. Open Settings on your iPhone.
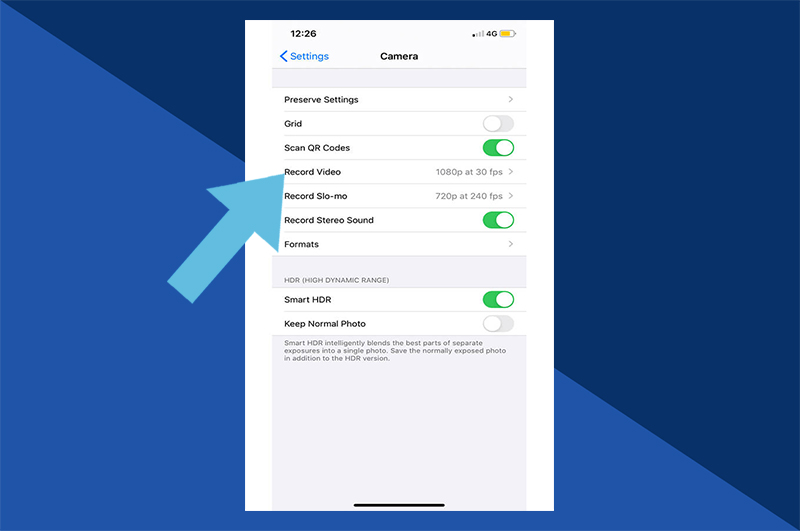
two. Click on Camera.
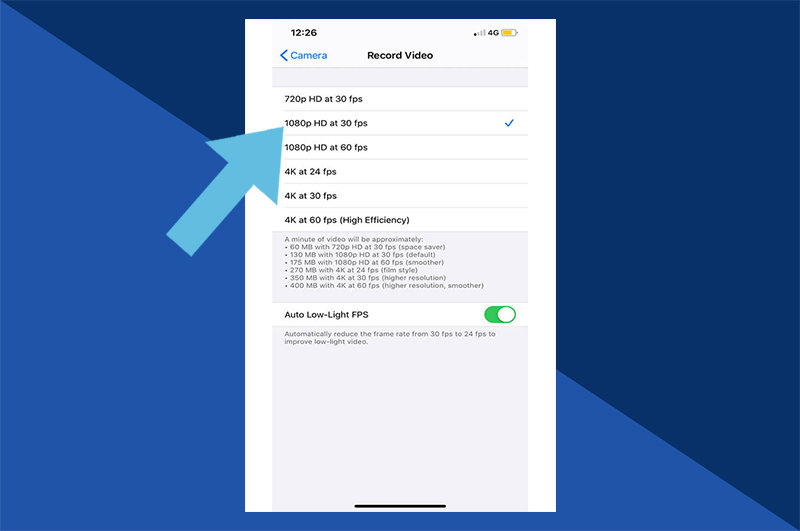
3. Select Tape Video
4. Select the highest resolution available.
Useful iPhone photographic camera settings
There are a number of settings available inside the Camera app that can help you take better photos. From using the filigree feature to create a well-composed shot to enabling Portrait mode for a blurred out background, once you nail the basics, you'll be creating striking images in no fourth dimension.
Beneath, we take a look at some of the best iPhone photographic camera settings to help you take images you tin can be proud of.
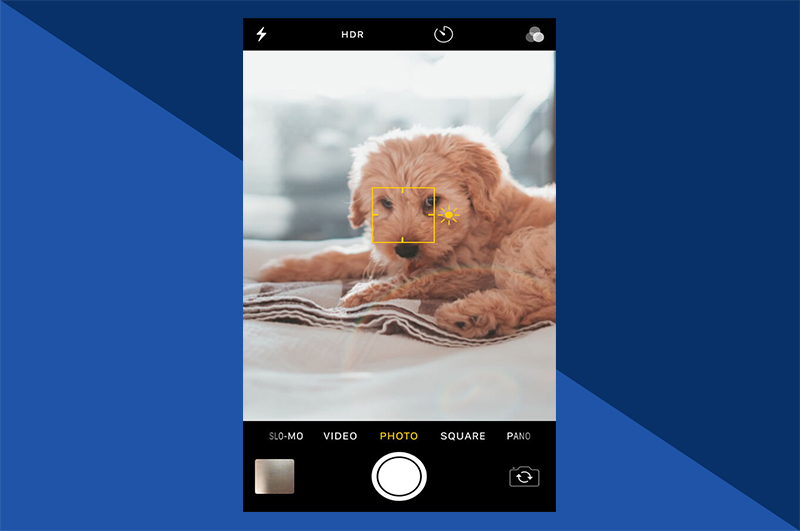
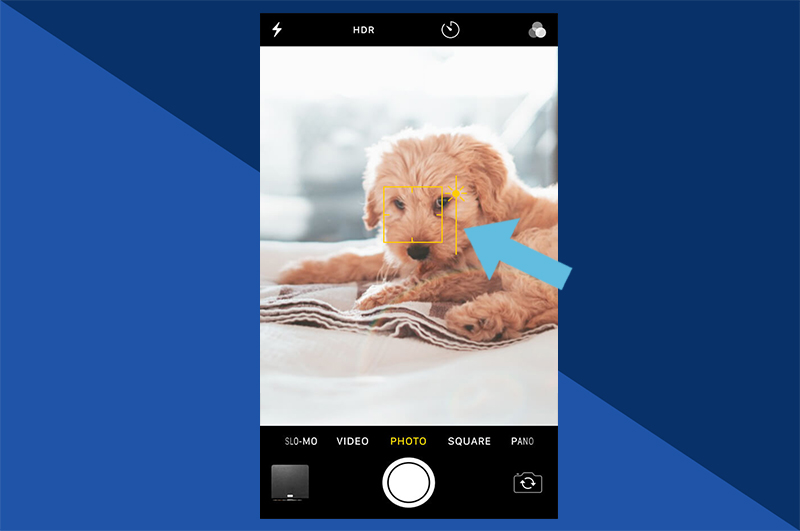
Using focus for sharper images
Ensuring your discipline is in focus is the all-time mode to take impressive photographs. Luckily, the iPhone Photographic camera app makes setting the focus easy – but frame your shot, so tap the screen where you lot want to focus. A yellow box will appear to show you the focus point. This volition ensure the subject of your photo isn't blurry, giving you a crisp, clear shot.
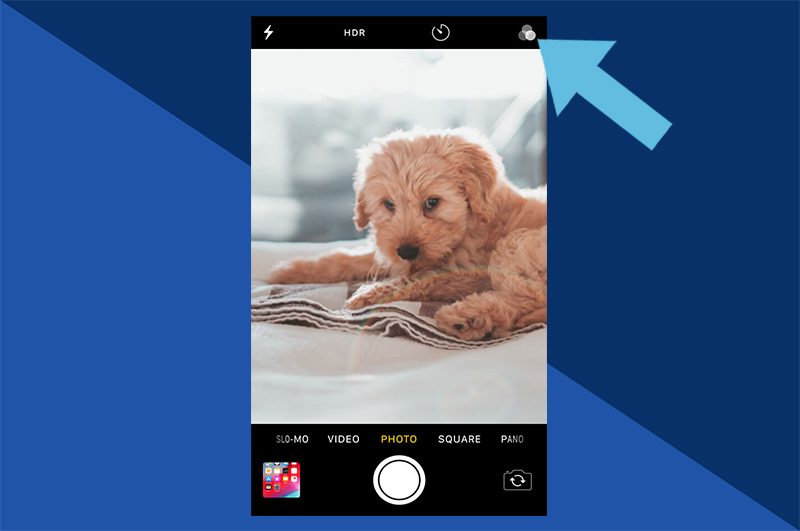
Taking live photos with filters
Want to change the colour or tone of your photograph to make the colours pop? No trouble, simply use filters! With options ranging from Vivid and Mono to Silvertone and Dramatic, the iPhone's congenital-in camera filters can you help tweak your images in simply a few unproblematic taps.
ane. Open your Photographic camera app.

two. Tap the filter icon in the height right-paw side (this looks similar three overlapping circles).
iii. Scroll through the filters until yous find 1 you similar.
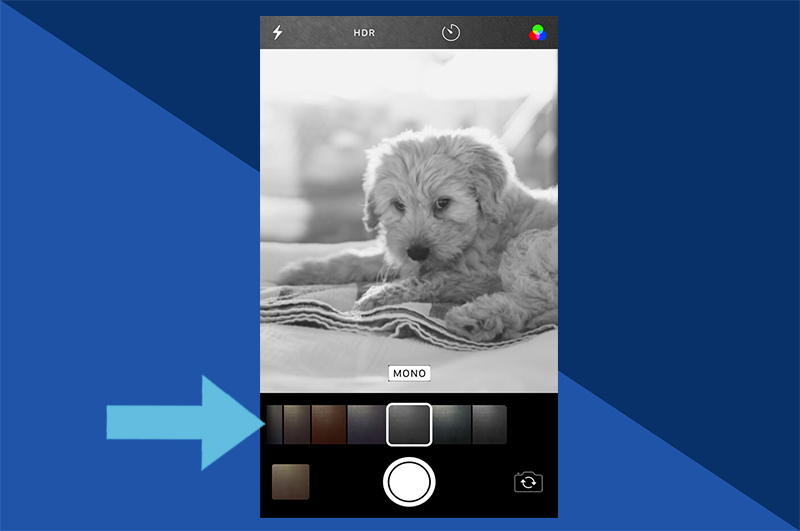
4. Take your shot.

v. When a filter is practical, the icon will alter from white circles to coloured circles.
6. To remove the filter, tap the filter icon and scroll dorsum to Original.
Using exposure to make photos lighter or darker
Exposure refers to the brightness of your photo. If it's underexposed, it ways the photo is likewise night, and if it's overexposed, it means the photo is too light.
When you tap your photo to focus your subject, the iPhone automatically sets your exposure level. Nevertheless, you tin can adjust the exposure manually by following the steps beneath.
i. In the Photographic camera app, set the focus of your image past tapping information technology.
two. Once the yellow box has appeared, just swipe upwards or down to increase or subtract the brightness.
three. When the exposure looks good, tap to take your photo.
Using the grid feature for better composition
The dominion of thirds is a well-known photography technique that can assistance yous have better images. Using two horizontal and two vertical gridlines, you can place your discipline slightly off centre to create a improve-equanimous photo. The gridlines are also useful for making sure your images are straight.
one. Open Settings on your iPhone.
2. Tap Photographic camera.
3. Make sure Grid is enabled.

Capture multiple action shots with burst mode
Want to take impressive action shots on your phone? Burst mode is groovy for photographing moving subjects. The feature takes ten photos per 2nd, then getting a shot of the perfect pose is easy.
To use burst mode on an iPhone xi and above:
ane. In the Camera app, slide the shutter button to the left until you reach burst mode.
2. Hold downwards your finger to use burst mode (the camera volition continue taking photos until yous release your finger from the screen).
For an iPhone XS and older:
i. In the Camera app, simply concord down the shutter button to shoot in burst fashion.
Using HDR to help you shoot in hard conditions
High Dynamic Range (HDR) lets you take well-lit photos that don't blow out highlights or lose detail in shadows. By taking several photos at different brightness levels and automatically blending these together, the HDR setting on your iPhone helps you create a well-exposed epitome in tough conditions.
one. In the Camera app, click the HDR icon.

2. From here, you tin can make up one's mind to let your camera automatically enable HDR, or plough it on or off manually.
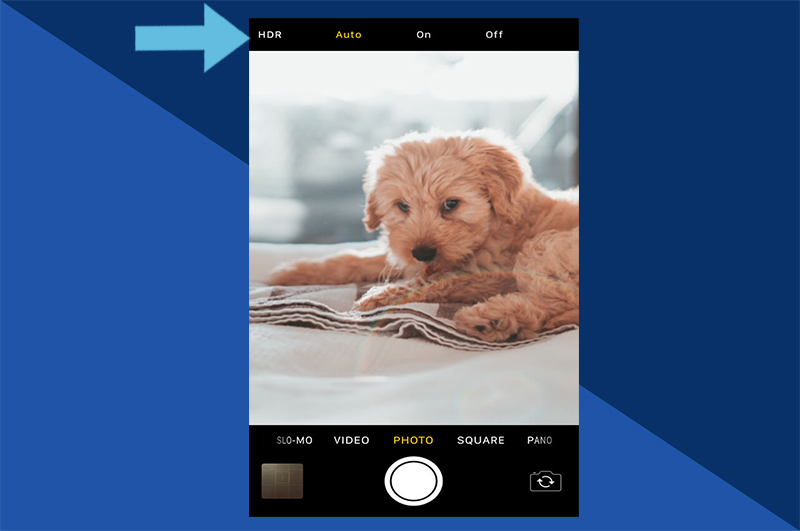
3. Once you've enabled HDR, the icon will turn xanthous.
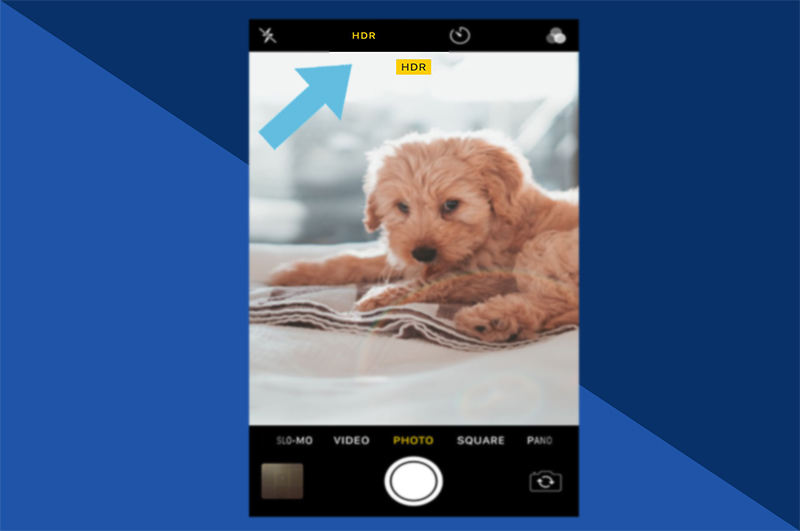
4. Tap the icon over again to plough HDR off.
Using live photograph to capture movement
By capturing the moments just before and later you accept your shot, live photo creates a moving image consummate with movement and audio that helps bring it to life. These 3-second videos are a great mode to think special moments across a simple, static image.
ane. In the Camera app, click the alive photos icon (a circular icon with a diagonal line through information technology).
2. Once live photos are enabled, the icon volition plow yellowish.
iii. Tap the icon again to turn live photos off.
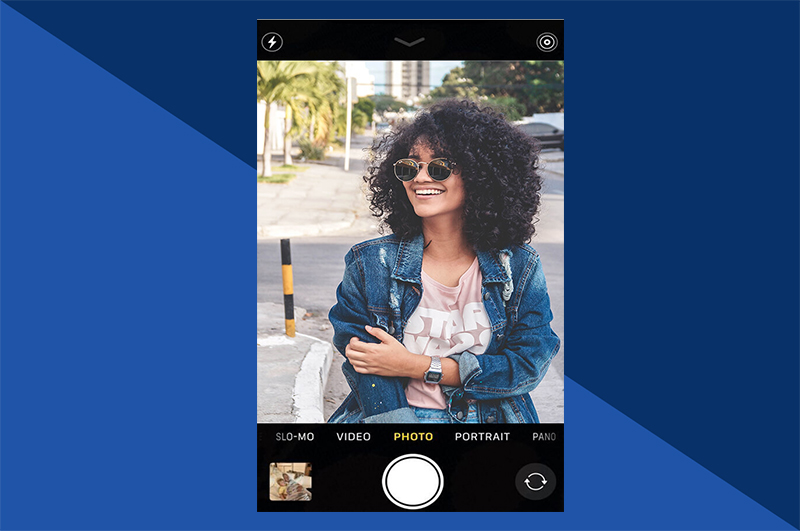
Using Portrait mode to mistiness image backgrounds
If you want to have professional-looking photographs, Portrait mode creates a shallow depth of field to accentuate your discipline and blur the background of your shot – creating a similar outcome to a DSLR camera. To use it, merely follow the steps below.
i. In the Photographic camera app, ringlet along to Portrait mode.
two. Ensure your field of study is between two and eight feet from the camera.
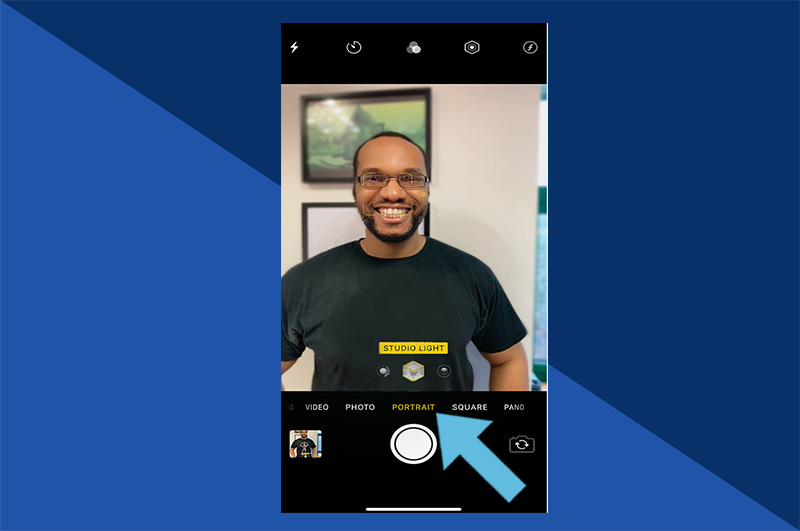
3. Expect for the yellow focus box to appear effectually your field of study.
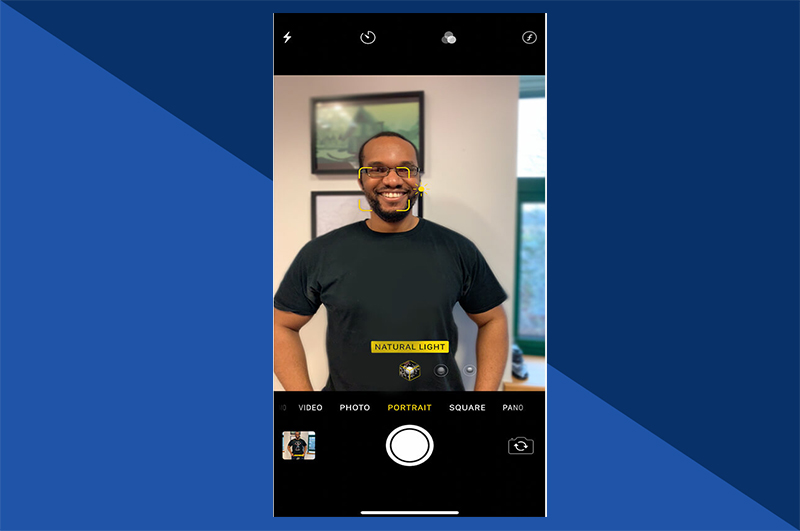
4. When Portrait mode is set, the words 'Natural Low-cal' will appear on the screen.
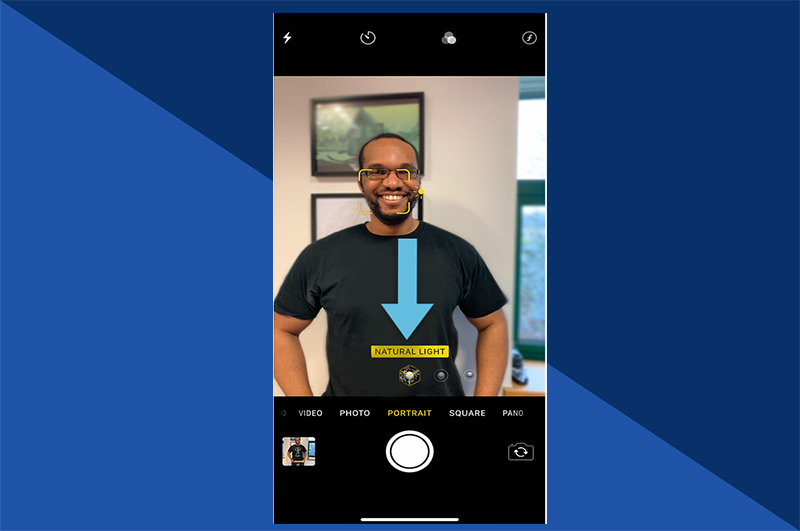
5. Tap the shutter button to take your portrait.

Setting the timer for hands-free shooting
The self-timer function creates a delay betwixt pressing the shutter and your image being taken. This means you can shoot easily-free and even appear in the photo yourself if using a tripod or balancing your iPhone on a sturdy surface. Here's how.
On an iPhone 11 and above:
1. Tap the up arrow at the tiptop of the screen to display boosted settings.

2. Select the timer icon.
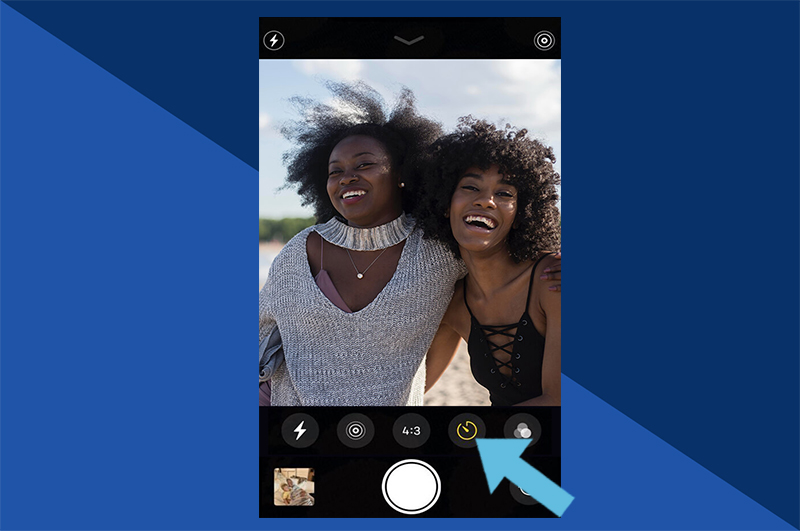
three. Select either a three-second or 10-second filibuster.
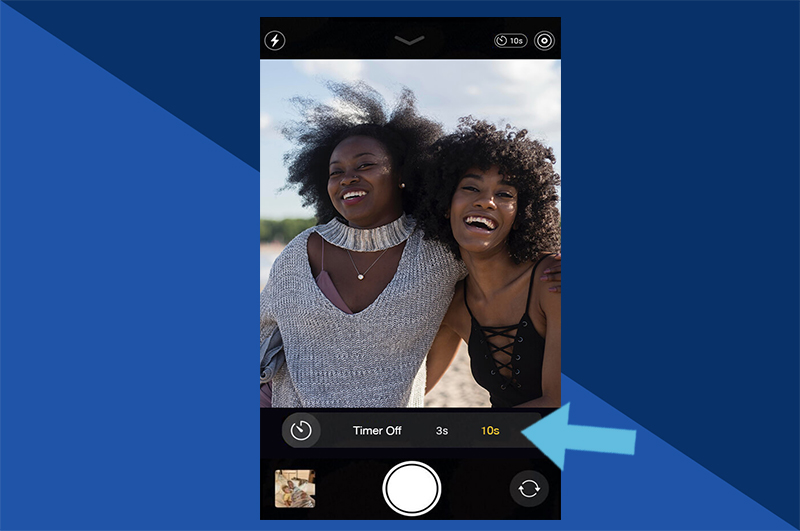
4. When yous're prepare, press the shutter.
On an iPhone XS and below:
1. Tap the timer icon at the meridian of the screen.
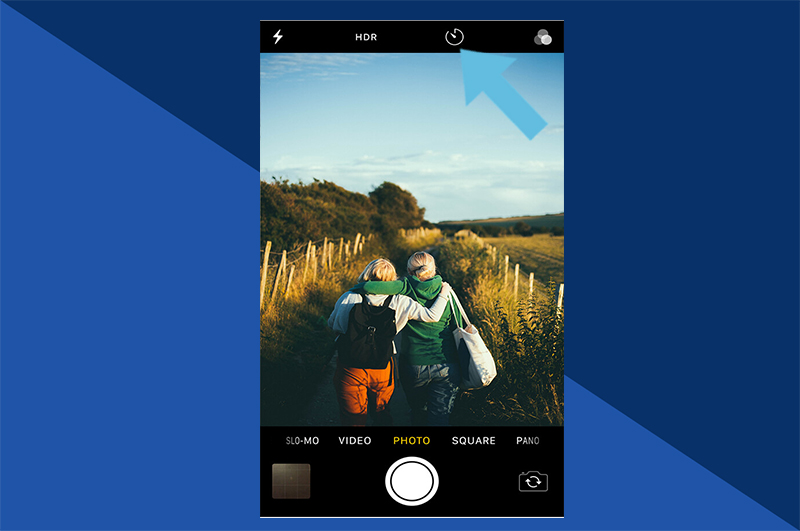
ii. Select either a 3-2d or 10-second delay.
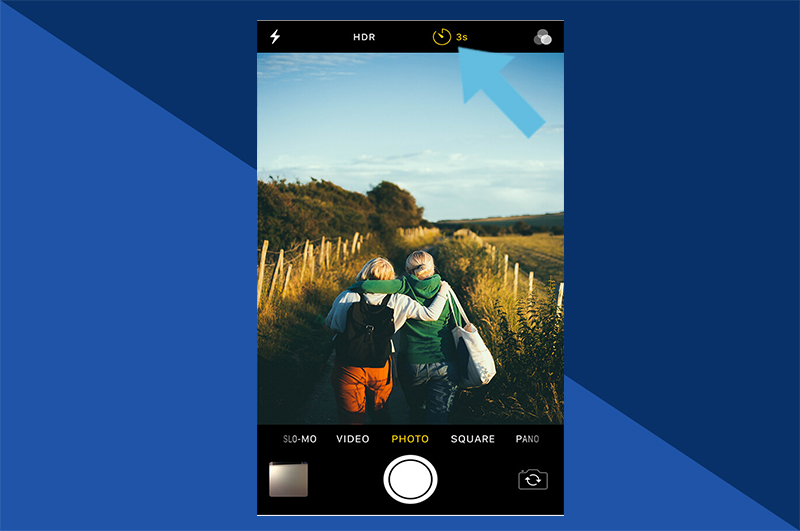
three. When you're fix, printing the shutter.
New features on the iPhone 11 Photographic camera
The launch of the iPhone xi brought with information technology some exciting new features and functionality which offer significant upgrades to the camera. Allow's take a expect at some of the features of the iPhone 11 that will aid y'all take better images.
Tri-lens photographic camera
Now boasting a 12-megapixel primary lens, an ultra-wide-bending lens and a telephoto lens, the iPhone eleven's photographic capabilities permit you to take your shots to the adjacent level. Shoot wide, shoot shut up, shoot in high quality – the iPhone xi lets you get more than creative with your images.
Night fashion
Shooting in low light? No problem! Dark fashion works automatically to capture dark subjects with natural colours and lighting, without the need for flash.

Smart HDR
The iPhone xi uses auto learning to ensure faces are captured with beautiful highlights and natural-looking pare tones, while ensuring the shot is well-exposed in both the highlights and shadows.
Bring your photos to life with Motif
Now you're taking meliorate photos, why non create a cute retention book with Motif? Whether information technology's your holiday photos, arty snaps of your domestic dog, or a family unit photograph album, creating a personalized photobook is easy with Motif.
With over 80 personalized layouts and the option to cull backgrounds and sizes that conform you lot, a photobook offers a cracking style to celebrate and share your favourite shots with family unit and friends. Download the app today and give your stories a home with Motif.
What did you lot call back of this article?
- Author
- Recent Posts

A natural born storyteller based in NYC and the Catskills. Pairing stories with photos for safe keeping and telling.
Source: https://www.blog.motifphotos.com/iphone-camera-settings-a-guide-to-taking-better-ios-photos/
Posted by: dayintere.blogspot.com
0 Response to "How To Set Iphone Camera To 280 X 296 Pixels"
Post a Comment