

How To Create Blog System In Laravel
How to Build a Blog with Laravel
![]()
Laravel is an amazing PHP framework for building web applications with a huge community around the world, thousands of packages contributed by community members and lots of online resources for learning. Though it is not really hard to get started building applications with Laravel, building
In this tutorial, I shall work you through how to build a simple blog with Laravel.
Create your first controller
php artisan make:controller HomeController it creates the controller which can be found here
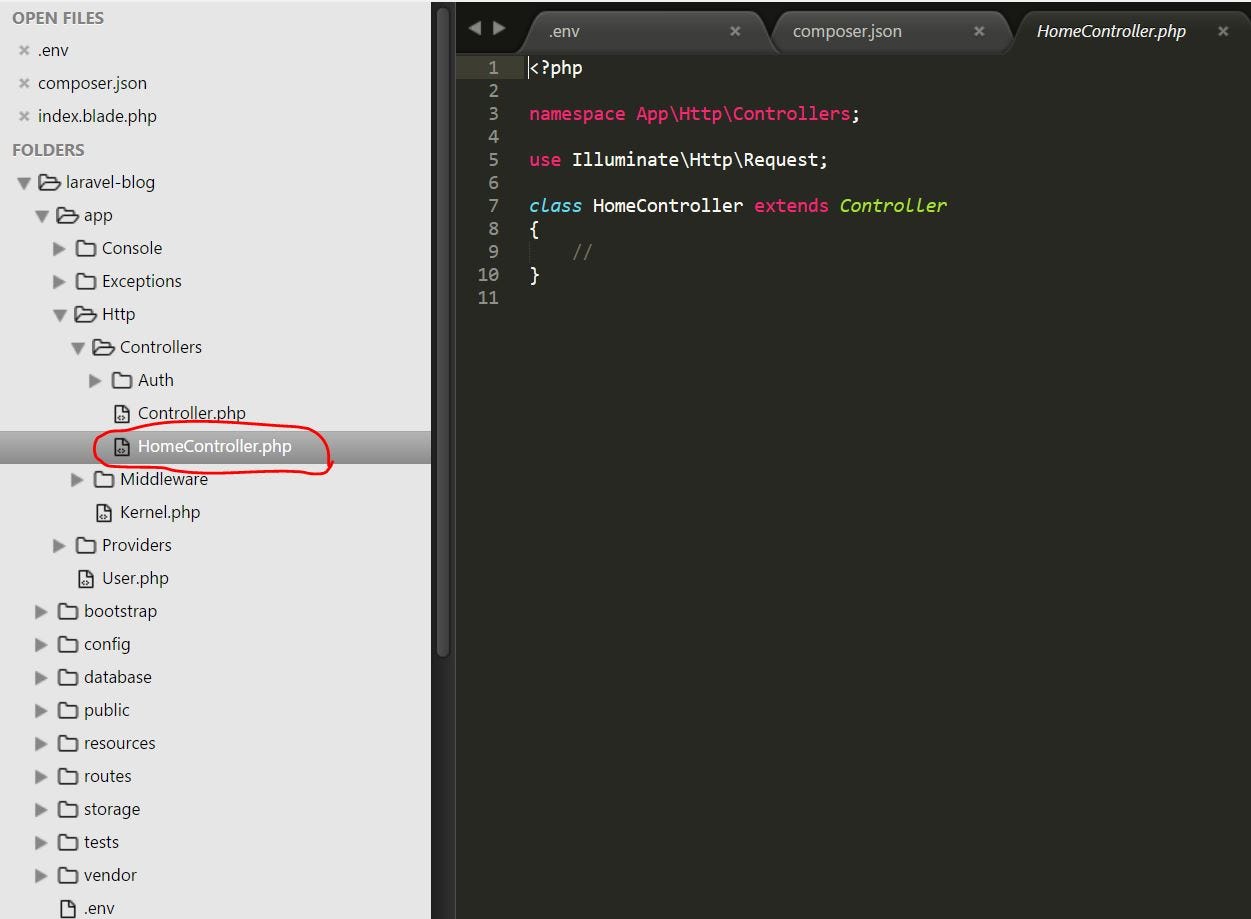
You will notice that there no actions
we will have to create our first action and create a corresponding view like so
          public function index()
{
            return view('home.index');
}
Sinc e Laravel encourages convention over configuration, we do not have to specify the full file path for the view that the controller action will render. home.index simply tells the Laravel router to find the file index.blade.php in home directory under views directory.
In my programming experience with other frameworks, I prefer creating a separate directory under views for each controller in order to neatly group view files.
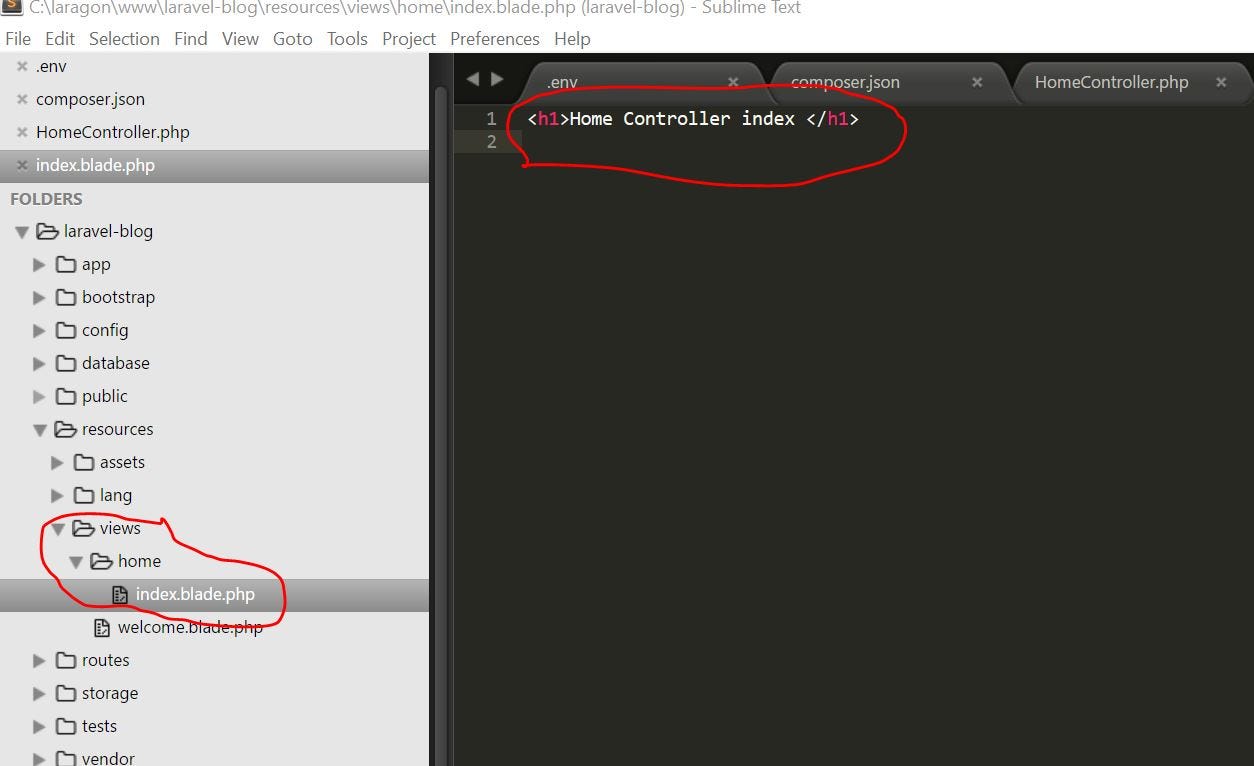
Let's go ahead and create our first view file
- Navigate to
resources/viewsin your app root - create a new directory
home - create a new file and name it
index.blade.phpunder thehomedirectory you created - Open the index.blade.php and type
<h1>Home Controller index</h1>and save
Your updated directory structure should look like this
We can make changes to the router so the our rootUrl routes to the index action in our home controller. Navigate to routes.web as below
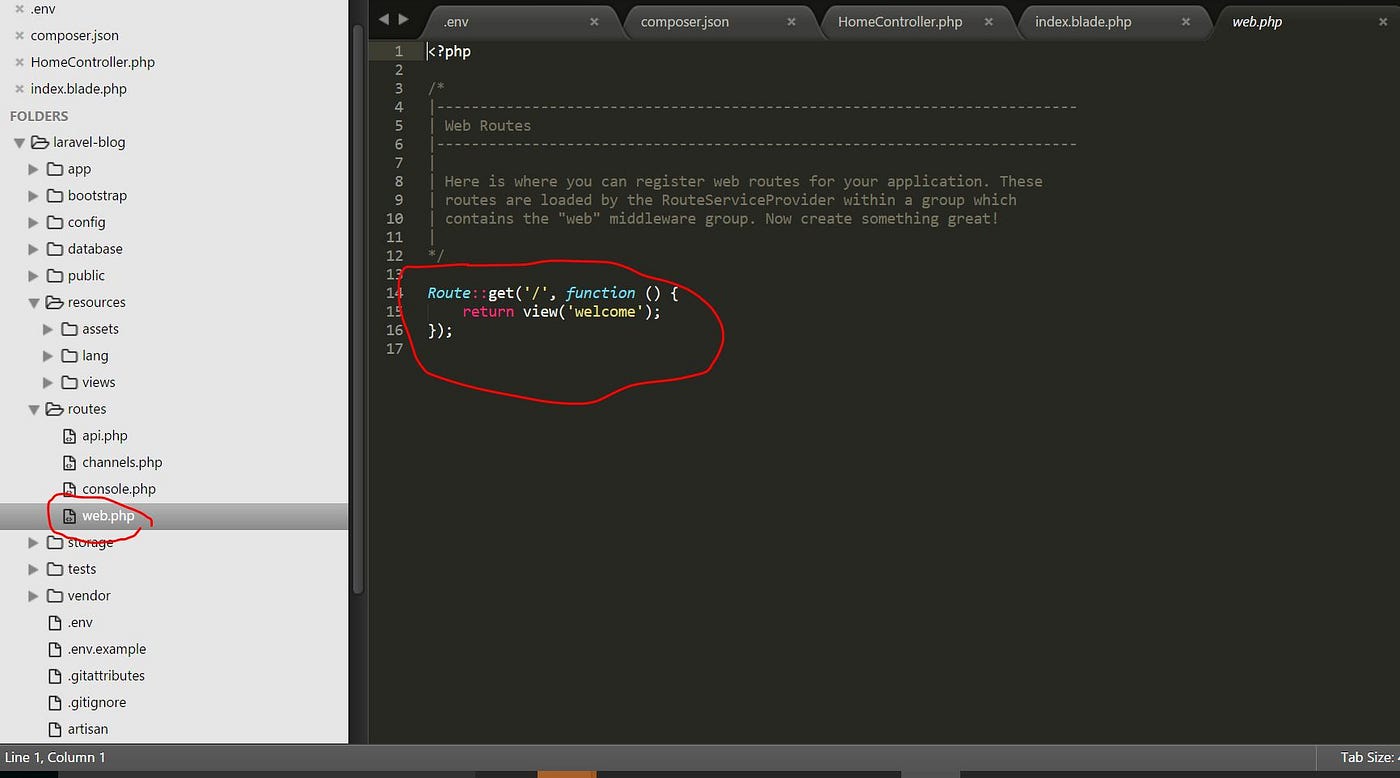
Comment out existing route code and type Route::get('/', 'HomeController@index'); as below
          14 // Route::get('/', function () {
15 //     return view('welcome');
16 // });
17
18 Route::get('/', 'HomeController@index');
Line 18 above instructs the router to forward all GET HTTP request on the rootUrl to the index action in the HomeController
Let's view our app in the browser again via laravel-blog.dev
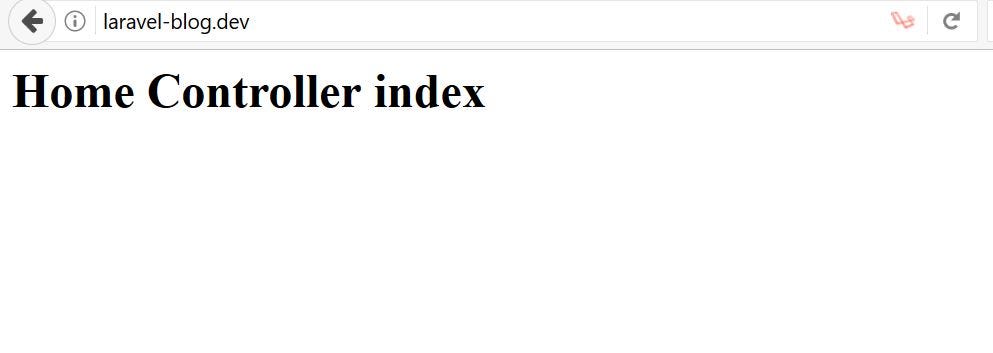
Yeah! It works.
At this point we have achieved our basic task of creating a controller, creating a view and editing the router file to direct requests to render our controller action in order to render a view. But our view pretty basic and we need to do something about it.
Let's Make it Beautiful
Laravel 5.4 by default ships with Twitter Bootstrap and we shall start by including Bootstrap in our app views. If you navigate to the public directory in your appRoot directory, you will see the js and css directories containing app.js and app.css respectively, our Bootstrap resources can be found in these files. See below
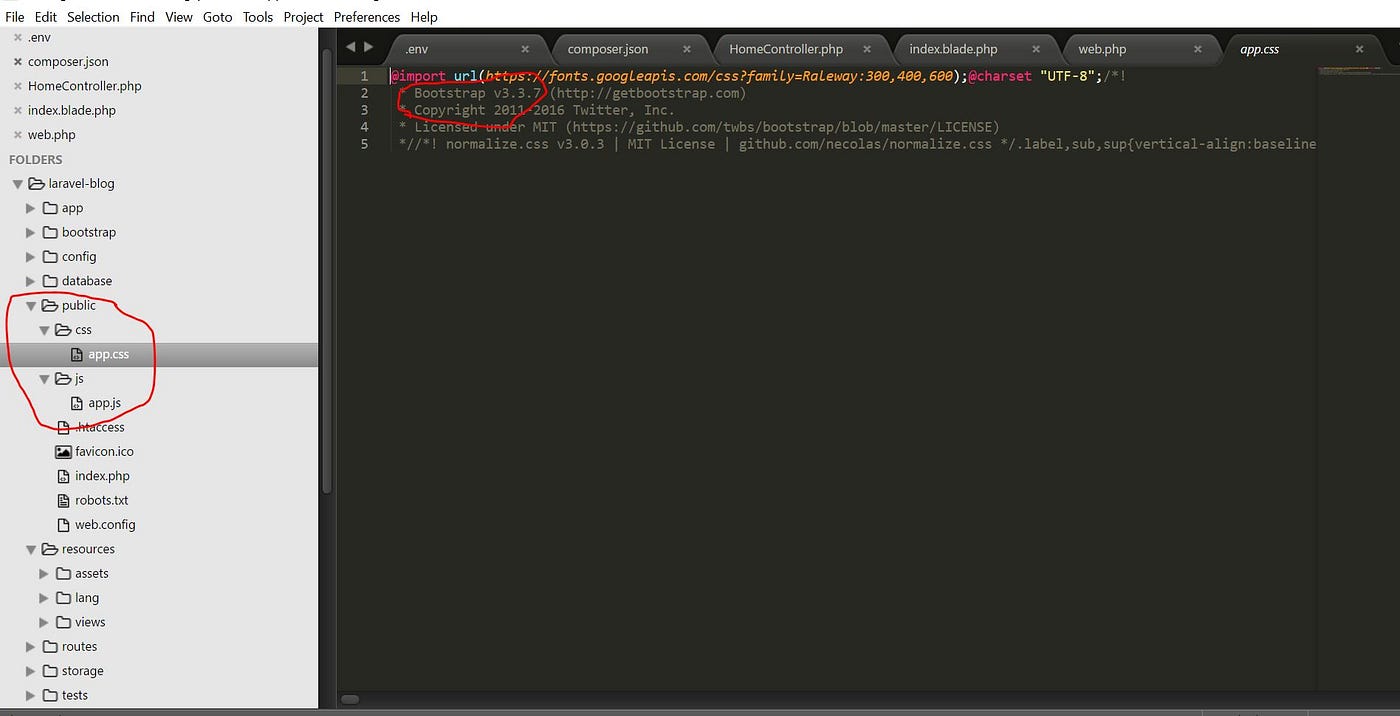
The version of bootstrap is displayed as a comment in app.css as shown above. Let us go ahead and modify our home.index with proper html tags and include bootstrap resources like so.
          //file: views/home/index.blade.php          <!DOCTYPE html>
<html lang="en">          <head>
            <meta charset="utf-8">
            <meta http-equiv="X-UA-Compatible" content="IE=edge">
            <meta name="viewport" content="width=device-width, initial-scale=1">
            <title>Laravel Blog</title>
            <!-- Bootstrap CSS -->
            <link rel="stylesheet" href="/css/app.css">
            </head>          <body>
            <h1 class="text-center">Laravel Blog</h1>
            <!-- Bootstrap JavaScript -->
            <script src="/js/app.js"></script>
            </body>          </html>
This code renders a prettier default page for us as shown below.

Let's Structure the blog Pages
We can structure our pages to have a unique design to ensure our blog is aesthetically uniform across pages. To do that, we need to create certain layouts and define structure for static and dynamic components.
For starters, we need to breakdown the components of our basic layout into header, main-content and footer This we can achieve by first of all creating placeholders using the div, header and footer tags like so
//file: views/home/index.blade.php <body>
<!-- Header starts here -->
<header>
</header>
<!-- Header ends --> <!-- Main content begins -->
<div class="main-content"></div>
<!-- Page footer begins -->
<!-- Main content ends here -->
<footer></footer>
<!-- Bootstrap JavaScript -->
<script src="/js/app.js"></script>
</body>
Then we added some inline css style to the page like so
          ......
            <!-- Bootstrap CSS -->
            <link rel="stylesheet" href="/css/app.css">
            <style>
            body {
            background: #e2e2e2;
            }                       header {
              min-height: 150px;
              background: #666;
              padding: 20px;
              margin-bottom: 15px;
              }                                   .footer-content {
              padding-top: 10px;
              }                                   .header-title,
              .header-sub {
              color: #e2e2e2;
              }                                   .header-sub {
              border-top: 1px solid #ccc;
              border-bottom: 1px solid #ccc;
              padding: 3px 0;
              }                                   .content {
              background: #fff;
              padding: 20px;
              margin-bottom: 10px;
              }
              </style>
              </head>
We then updated the header section to
          <!-- Header starts here -->
            <header class="text-center">
            <h1 class="header-title">Laravel Blog</h1>
            <span class="header-sub">Created by <b>David Inyang-Etoh</b></span>
            </header>
            <!-- Header ends -->
## main-content
          <!-- Main content begins -->
            <div class="main-content">
            <div class="container">
            <div class="content">
            <h3>Getting Started with Laravel 5.5</h3>
            <p>Lorem Ipsum is simply dummy text of the printing and typesetting industry. Lorem Ipsum has been the industry's standard dummy text ever since the 1500s, when an unknown printer took a galley of type and scrambled it to make a type specimen book. It has survived not only five centuries, but also the leap into electronic typesetting, remaining essentially unchanged. It was popularised in the 1960s with the release of Letraset sheets containing Lorem Ipsum passages, and more recently with desktop publishing software like Aldus PageMaker including versions of Lorem Ipsum</p>
            </div>
            </div>
            </div>
            <!-- Main content ends here -->
## footer
<!-- Page footer begins -->
<footer class="navbar navbar-fixed-bottom">
<div class="container text-center">
© {{ date('Y')}}. All rights reserved.
</div>
</footer> Which we end up getting this beautiful page
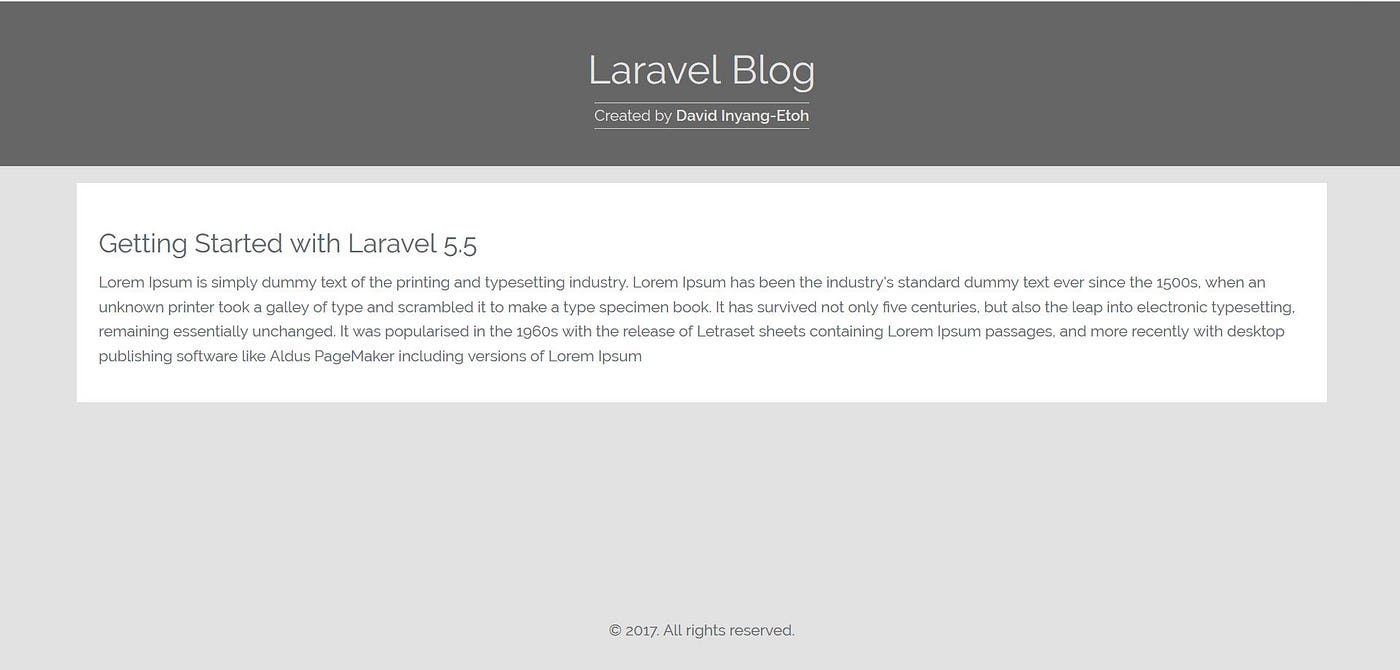
Putting it all together, the code in home/index.blade.php is as below
<!DOCTYPE html>
<html lang="en"> <head>
<meta charset="utf-8">
<meta http-equiv="X-UA-Compatible" content="IE=edge">
<meta name="viewport" content="width=device-width, initial-scale=1">
<title>Laravel Blog</title>
<!-- Bootstrap CSS -->
<link rel="stylesheet" href="/css/app.css">
<style>
body {
background: #e2e2e2;
}header {
min-height: 150px;
background: #666;
padding: 20px;
margin-bottom: 15px;
}.footer-content {
padding-top: 10px;
}.header-title,
.header-sub {
color: #e2e2e2;
}.header-sub {
border-top: 1px solid #ccc;
border-bottom: 1px solid #ccc;
padding: 3px 0;
}.content {
<body>
background: #fff;
padding: 20px;
margin-bottom: 10px;
}
</style>
</head>
<!-- Header starts here -->
<header class="text-center">
<h1 class="header-title">Laravel Blog</h1>
<span class="header-sub">Created by <b>David Inyang-Etoh</b></span>
</header>
<!-- Header ends -->
<!-- Main content begins -->
<div class="main-content">
<div class="container">
<div class="content">
<h3>Getting Started with Laravel 5.5</h3>
<p>Lorem Ipsum is simply dummy text of the printing and typesetting industry. Lorem Ipsum has been the industry's standard dummy text ever since the 1500s, when an unknown printer took a galley of type and scrambled it to make a type specimen book. It has survived not only five centuries, but also the leap into electronic typesetting, remaining essentially unchanged. It was popularised in the 1960s with the release of Letraset sheets containing Lorem Ipsum passages, and more recently with desktop publishing software like Aldus PageMaker including versions of Lorem Ipsum</p>
</div>
</div>
</div>
<!-- Main content ends here -->
<!-- Page footer begins -->
<footer class="navbar navbar-fixed-bottom">
<div class="container text-center">
© {{ date('Y')}}. All rights reserved.
</div>
</footer>
<!-- Bootstrap JavaScript -->
<script src="/js/app.js"></script>
</body> </html>
The Layout Master
Having set the tone of what our blog will look like, it is reasonable to use the powerful tools of Laravel and the Blade template engine and create a master layout that views will extend to maintain unique aesthetic properties.
Let's create a layout directory and create three files namely: app.blade.php, header.blade.php and footer.blade.php like so
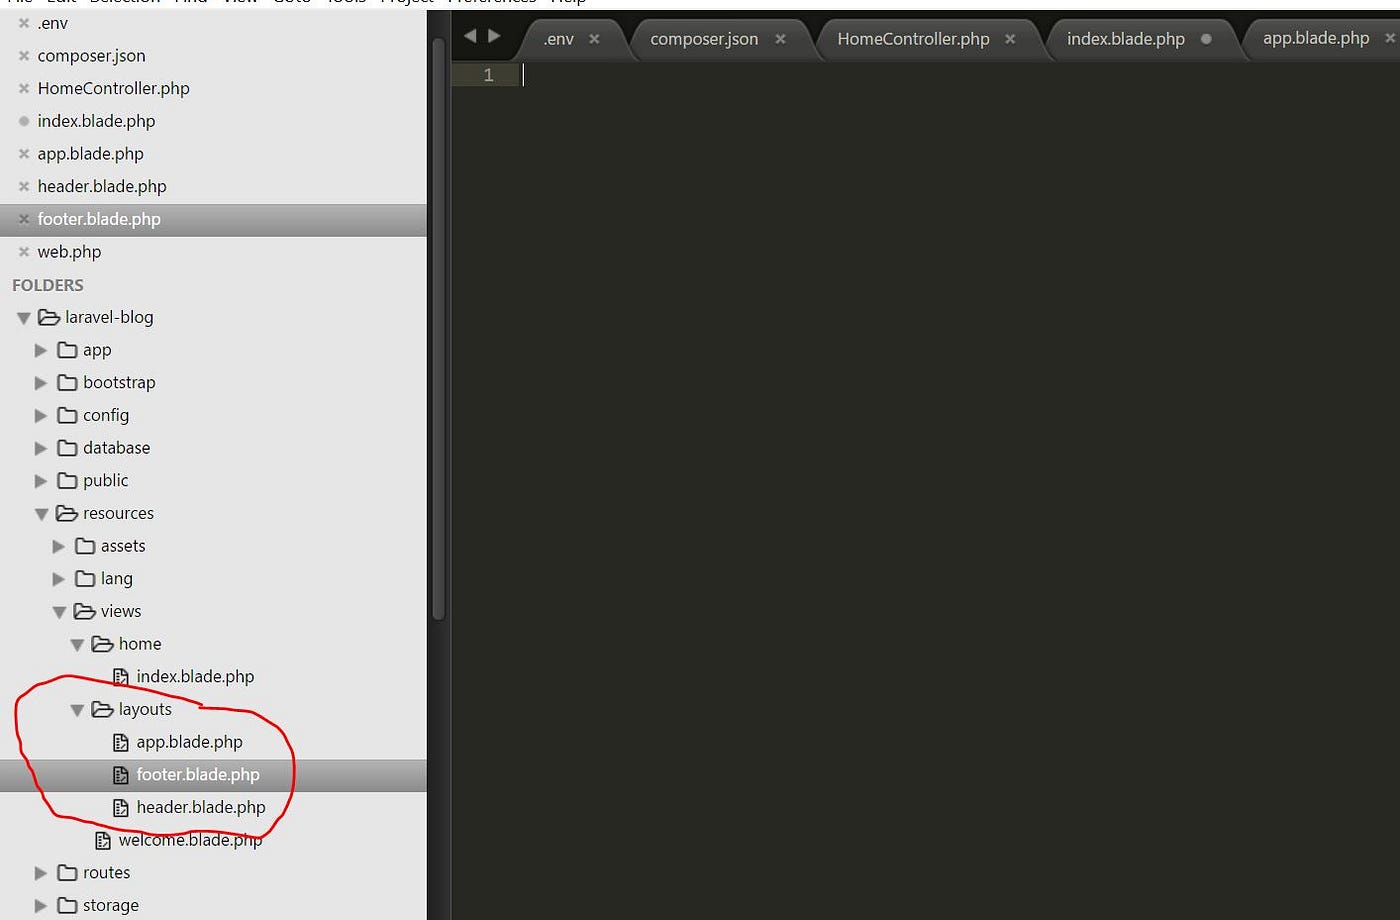
We shall copy the code in the header section in index.blade.php to layouts/header.blade.php and copy the footer code to layouts/footer.blade.php. Finally, we copy everything in home.index to layouts.app except the header, main-content and footer sections, then use blade directives to include the layouts and extend parent layout. The layouts.app is now simplified to
<!DOCTYPE html>
<html lang="en"> <head>
<meta charset="utf-8">
<meta http-equiv="X-UA-Compatible" content="IE=edge">
<meta name="viewport" content="width=device-width, initial-scale=1">
<title>Laravel Blog</title>
<!-- Bootstrap CSS -->
<link rel="stylesheet" href="/css/app.css">
<style>
body {
background: #e2e2e2;
}header {
min-height: 150px;
background: #666;
padding: 20px;
margin-bottom: 15px;
}.footer-content {
padding-top: 10px;
}.header-title,
.header-sub {
color: #e2e2e2;
}.header-sub {
border-top: 1px solid #ccc;
border-bottom: 1px solid #ccc;
padding: 3px 0;
}.content {
<body>
background: #fff;
padding: 20px;
margin-bottom: 10px;
}
</style>
</head>
<!-- include Header layout -->
@include('layouts.header')
<!-- setup to display dynamic page content here -->
<div class="main-content">
<div class="container">
@yield('content')
</div>
</div>
<!-- include Footer layout -->
@include('layouts.footer')
<!-- Bootstrap JavaScript -->
<script src="/js/app.js"></script>
</body> </html>
And the home/index.blade.php now becomes
          @extends('layouts.app')
<!-- Page content begins -->
@section('content')
<div class="content">
            <h3>Getting Started with Laravel 5.5</h3>
            <p>Lorem Ipsum is simply dummy text of the printing and typesetting industry. Lorem Ipsum has been the industry's standard dummy text ever since the 1500s, when an unknown printer took a galley of type and scrambled it to make a type specimen book. It has survived not only five centuries, but also the leap into electronic typesetting, remaining essentially unchanged. It was popularised in the 1960s with the release of Letraset sheets containing Lorem Ipsum passages, and more recently with desktop publishing software like Aldus PageMaker including versions of Lorem Ipsum</p>
</div>
@endsection
Setting up the Database
When you are creating a project with laragon, it automatically creates a database with same name as the project for you. We need to update the default database environment variables like so
          DB_DATABASE=laravel-blog
DB_USERNAME=root
DB_PASSWORD=
If you are using a different setup other than Laragon, make the adjustment to meet your database authentication config
Let's Write Migrations
…updates coming soon
Repo: https://github.com/dinyangetoh/laravel-blog
How To Create Blog System In Laravel
Source: https://medium.com/@dinyangetoh/how-to-build-a-blog-with-laravel-9f735d1f3116
Posted by: dayintere.blogspot.com
0 Response to "How To Create Blog System In Laravel"
Post a Comment